

Table of contents
Azure Firewall is a cloud service under the Azure security umbrella that allows customers to centrally manage all their network traffic with built-in capabilities, including high capability, scalability and performance.
Let's see how you can protect your network resources from undesired threats while perusing important Azure Firewall concepts!
Initial scenario
- AzureSpringClean-RG is an Azure Resource Group. All resources are and will be included here.

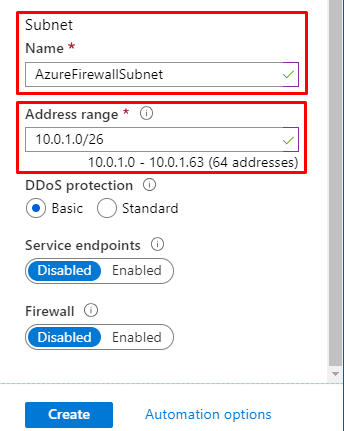
- UniversityVirtualNetwork is an Azure Virtual Network with 65536 addresses available. The assigned address space is 10.0.0.0/16. It also contains a subnet named AzureFirewallSubnet with an address range of 10.0.1.0/26 which will be used to host the firewall. Due to this, this particular subnet name is mandatory. Moreover, it must include a /26 mask.

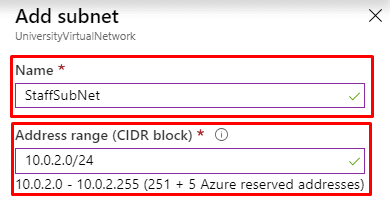
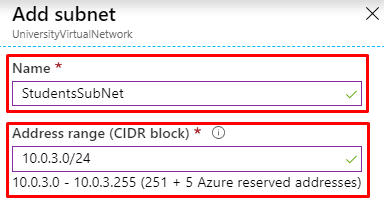
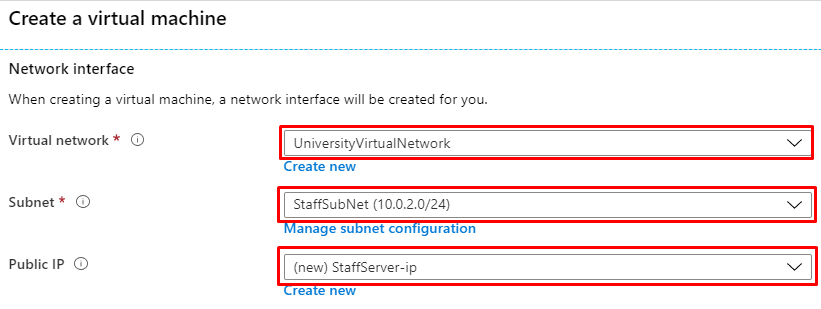
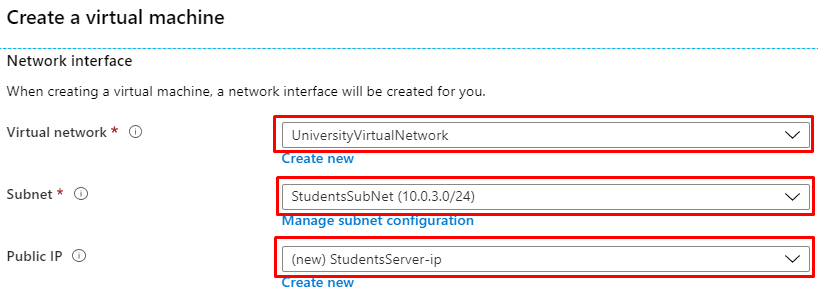
- In addition, the UniversityVirtualNetwork contains a couple of subnets: StaffSubNet (Address range: 10.0.2.0/24) and StudentsSubNet (Address range: 10.0.3.0/24)
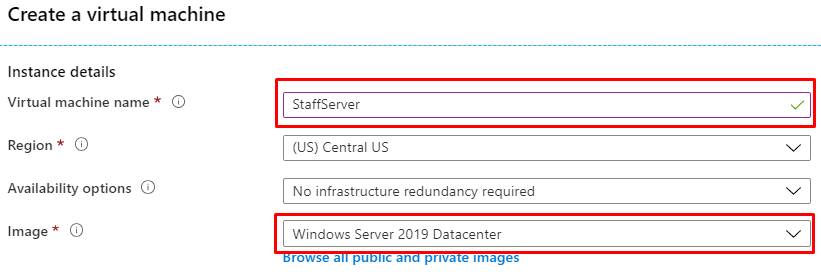
- StaffServer is a Windows Server 2019 Datacenter virtual machine that is located within the StaffSubNet. It is accessible through RDP.
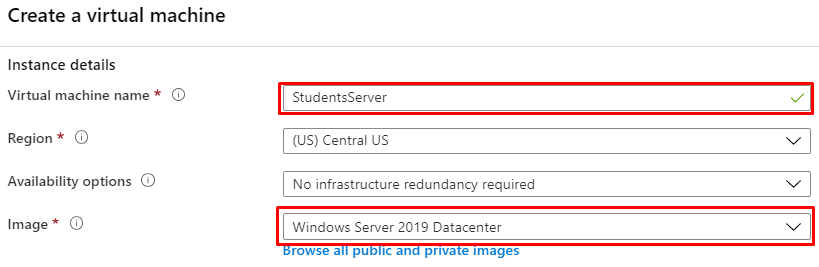
- In similar fashion, StudentsServer is a Windows Server 2019 Datacenter virtual machine within the StudentsSubNet. It is accessible through RDP.
With this setup, let's proceed to create the firewall!
Firewall setup
On the Azure Portal, create a new resource. Under Network, you can find Firewall.
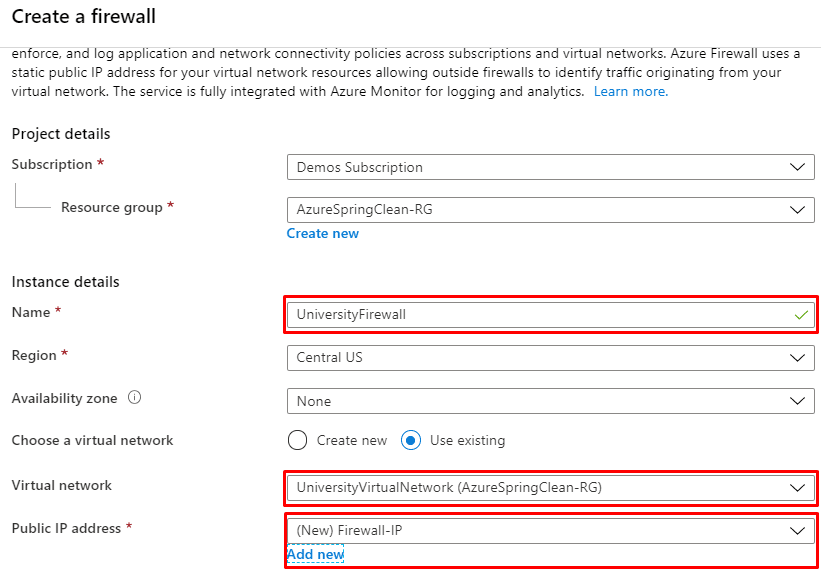
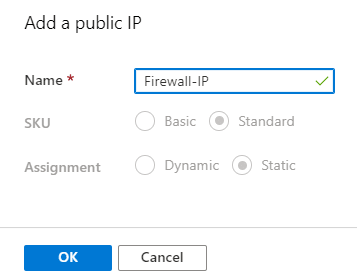
The name of this resource is UniversityFirewall. It must be located in the same region as the rest of the resources (US Central in this case). Moreover, it has to be placed inside the UniversityVirtualNetwork. For the Public IP address field, create a new one and select it.
Click on Create and wait a few minutes until the deployment is completed.
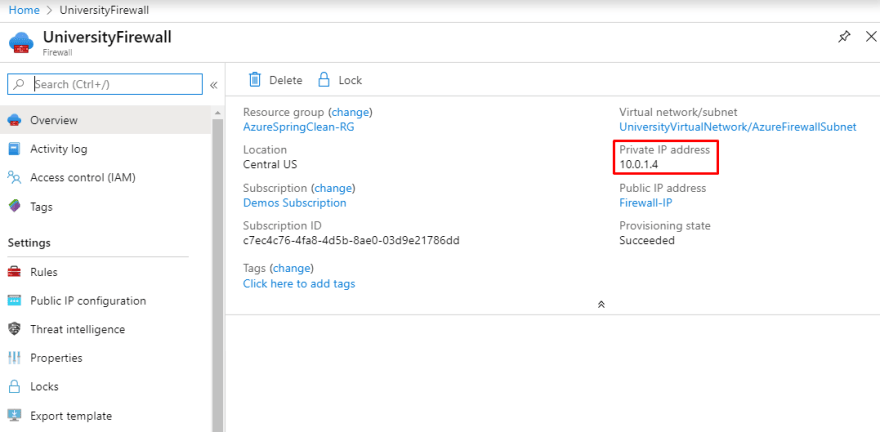
After this process is finished, go to the UniversityFirewall resource and take a look at the private IP address. We will use it in the next step for data routing.
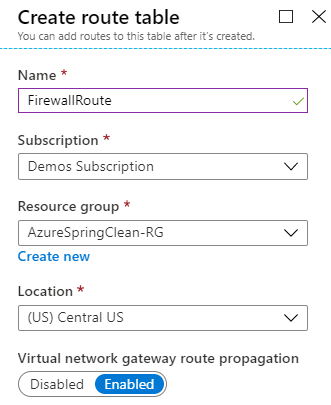
- Now, let's create an outbound default route where data will go through the firewall. Add a Route table resource (under Networking) with the name FirewallRoute.
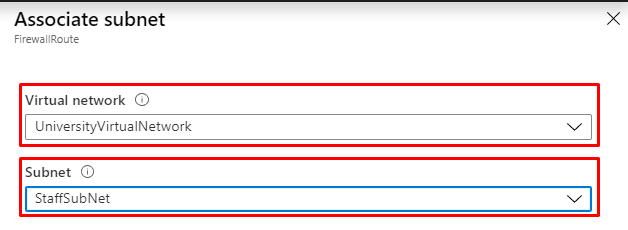
- After the resource is created, select it and click on Subnets and Associate the StaffSubNet subnet.
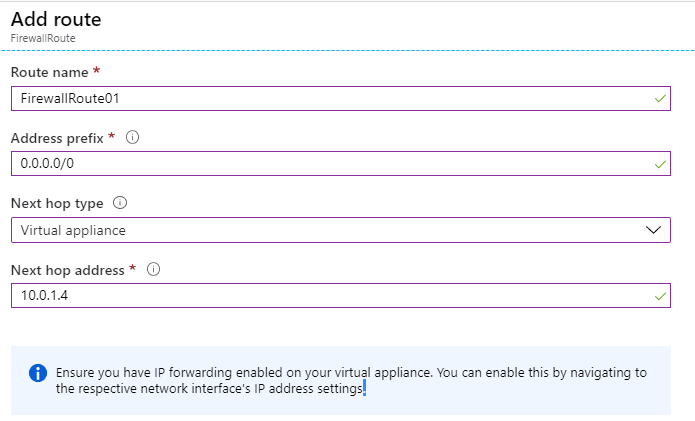
- Now select Routes and Add a new route named FirewallRoute01 with the 0.0.0.0/0 address prefix and Virtual appliance next hop type, which also requires a next hop address. We'll use the private IP address that we obtained when we created the Azure Firewall resource.
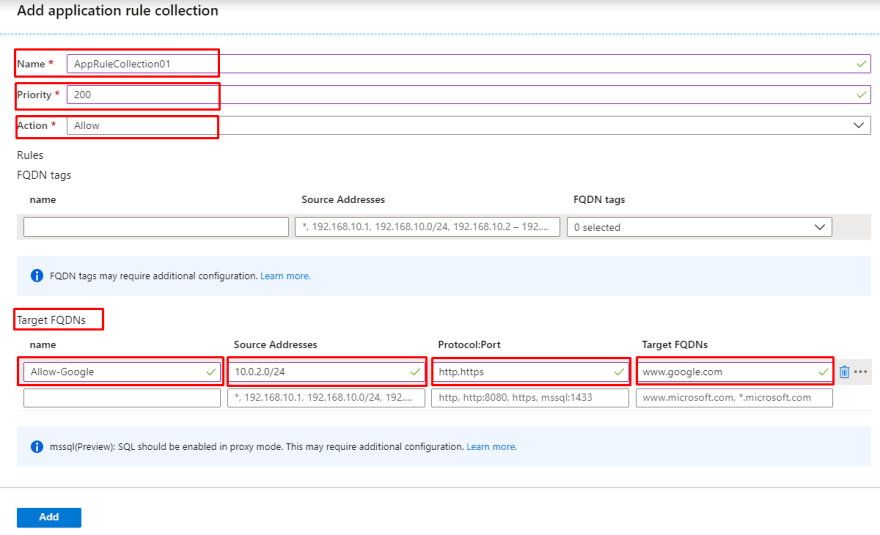
- Next up, we are configuring an application rule to allow outbond access to Google website. For this, on the UniversityFirewall page, select Rules (under Settings) and Add a new application rule collection named AppRuleCollection01 which has a priority value of 200 and an Allow action. It also includes a FQDN target named Allow-Google which allows source addresses from 10.0.2.0/24 subnet, the http,https protocols, and the google.com target FQDN.
- We also need to set up a network rule which allows outbound access to two IP addresses at the DNS port. For this, Add a new network rule collection named NetRuleCollection01 which has a priority value of 200 and an Allow action. It also includes an IP address rule named Allow-DNS which allows traffic from the UDP protocol, source addresses from 10.0.2.0/24 subnet and 209.244.0.3,209.244.0.4 destination addresses (these are free DNS servers operated by CenturyLink). Finally, the destination port is 53.

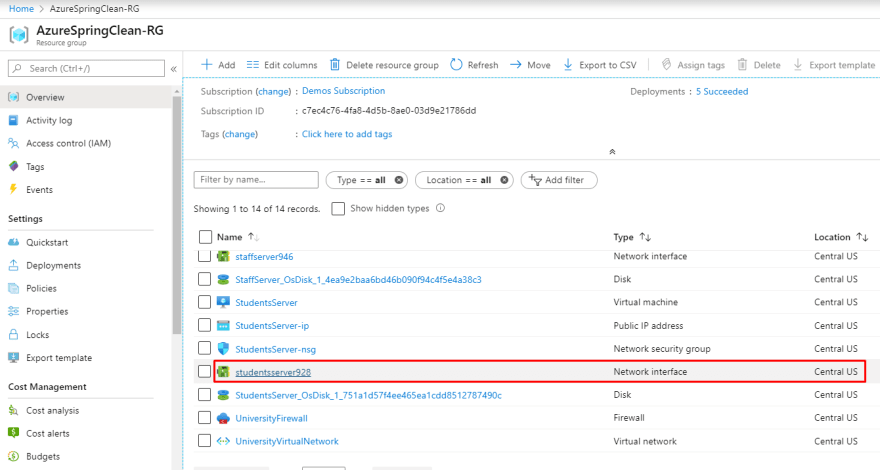
- We finished! The Azure Firewall is all set. However, in order to test our configuration, we need to set the DNS addresses for the StudentsServer network interface, so under your resource group, click on the network interface created for the StudentsServer element.
Now select DNS servers and add a Custom configuration:
209.244.0.3 is the first DNS server...
while 209.244.0.4 is the second one

- Save your configuration
Let's test it!
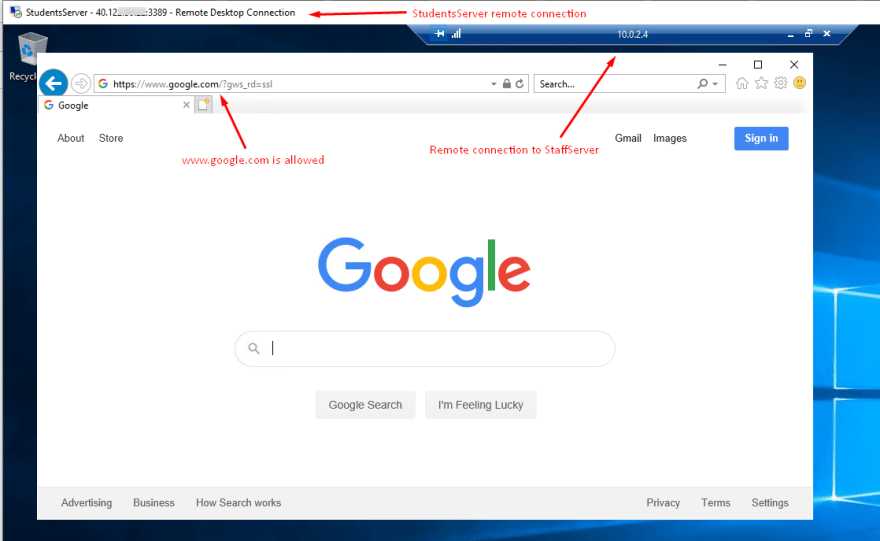
So first we connect to our StudentsServer virtual machine through remote desktop. From there, we connect to the StaffServer virtual machine also through remote desktop.
If we open a browser and go to https://www.google.com, the connection is allowed.
And if we go to another address, such as https://www.microsoft.com, the firewall blocks the request.
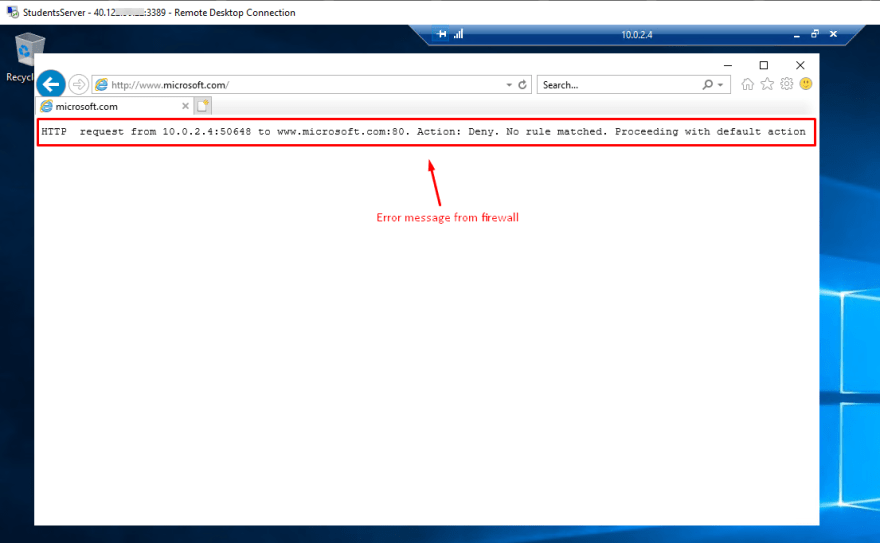
This test demonstrated that the firewalls rules are applied, allowing us to connect to the FQDN included in the settings -while denying service to any other- and also that the DNS names are resolved by the external DNS server(s).
As you can see, it is really important to add security to our cloud resources. Azure Firewall assists you in protecting your virtual environment from external attacks.